





How do you choose the right adhesive applicator? Start not with the gun drive, but with the packaging and material technology. A one-component sealant in a 310 ml cartridge requires a different tool from a 2K adhesive in a dual cartridge, while precise cyanoacrylate dispensing through a needle needs another type of application system again.
Only after matching the applicator to the package format, 2K mixing ratio, viscosity and required output should you decide whether a manual, pneumatic or battery-powered drive is the better option. In production, operator ergonomics, bead repeatability and the actual process cost also need to be considered.
Key takeaways
- First check the package type and capacity; for 2K adhesives, also verify the mixing ratio and cartridge system.
- A manual gun is simple and mobile, but frequent high-force dispensing can increase operator load.
- Pneumatic and battery-powered tools can reduce manual squeezing force, but they do not automatically guarantee constant output. Viscosity, temperature, nozzle or mixer geometry and drive settings still matter.
- In a 2K system, the correct ratio depends on compatibility between the cartridge, plungers/applicator and the required component ratio. The static mixer is responsible for mixing the two streams, not establishing the ratio.
- A needle or dispensing tip is part of the application system. Its diameter should be matched to viscosity, required dot size and flow rate.
- There is no universal rule that a manual gun becomes inefficient after exactly the second cartridge. Any such threshold should be measured in the actual process.
Where should you start when choosing an adhesive applicator?
A common mistake is to select a gun simply because it is described as “for 2K adhesive” or “for polyurethane” without checking how the specific product is packaged. The applicator must physically fit the cartridge or sausage and provide the required plunger travel and dispensing force.
| Material / package | What to check | Typical dispensing solution |
|---|---|---|
| 1K in a cartridge | Capacity, cartridge diameter, viscosity and required dispensing force. | Manual, pneumatic or battery-powered gun compatible with the package. |
| 1K in a sausage / foil pack | Sausage capacity, barrel design, viscosity and closure type. | Manual or powered sausage applicator. |
| 2K in a dual cartridge | Capacity, cartridge system, A:B ratio and compatible mixer. | Dedicated 2K applicator with the correct plungers and static mixer. |
| Low-viscosity adhesive | Required dot size, tip diameter and material compatibility. | Syringe, dispensing container, valve or Luer Lock tip/needle. |
| Hot-melt adhesive | Adhesive format and required melting/application temperature. | Gun or heated dispensing system designed for the specific hot-melt. |
For a broad selection of application tools, see the current English Adhesive dispensing category and the dedicated Dosing guns category.
Types of adhesive applicators
Manual adhesive applicator – when is it enough?
A manual gun is a good choice for service work, low-volume assembly and jobs carried out in different locations. It does not require compressed air or a battery, and selection can be straightforward when the cartridge format and required ratio are known.
For high-viscosity materials, pay attention to the mechanical advantage and maximum dispensing force. A higher gear ratio can reduce the trigger force required from the operator, but it does not automatically make a gun suitable for every highly viscous product.
...
Pneumatic adhesive applicator – less manual squeezing
A pneumatic tool uses compressed air to move the piston, so the operator does not have to generate every dispensing stroke by hand. This is particularly useful in repetitive work and with materials that require higher extrusion force.
Pneumatic drive should not, however, be confused with automatically constant output. The actual material flow depends on factors including air pressure and flow, product viscosity and temperature, nozzle or mixer geometry and resistance inside the cartridge. In series production, these parameters should be defined and recorded in the process standard.
...
Battery-powered or electric adhesive applicator
An electric drive sits between the mobility of a manual tool and the operator relief offered by pneumatic dispensing. Depending on the model, it may provide piston-speed control, automatic retraction when the trigger is released or other functions that help reduce material run-on after the bead is completed.
When choosing a tool, look beyond battery voltage. Check the dispensing force, compatible package format, tool weight and adjustment range. A high-force tool may be necessary for a viscous material, but the additional tool mass also affects workstation ergonomics.
2K adhesive applicators – what actually determines the A:B ratio?
In a two-component system, the cartridge, applicator and mixer must be treated as one system. A dual cartridge has defined chamber geometry and volume, while the compatible applicator moves both plungers according to the cartridge design and required ratio, for example 1:1, 2:1, 4:1 or 10:1.
The static mixer does not determine the A:B ratio. Its job is to homogenise two streams that have already been correctly metered by the cartridge and dispenser system. Medmix separates cartridge, dispenser and mixer systems by capacity, geometry and ratio for exactly this reason.
Precision dispensing: needle, nozzle or valve?
A “needle applicator” is usually not a separate gun type. It is more often a dispensing container or system fitted with the appropriate tip. Luer Lock needles are useful for applying small dots of material, but the internal diameter must be matched to viscosity. A tip that is too narrow for a viscous product increases flow resistance and can make stable dispensing difficult.
In larger-scale production, the needle may be the final tip connected to a syringe, valve or controlled pressure system. Selection should be based on the required deposit area, dose volume and process tolerance, not simply on the industry in which the system is used.
...
PU adhesives and MS polymers – do they need a special applicator?
There is no single universal “polyurethane gun”. The required tool is determined primarily by the packaging and viscosity of the specific product. A one-component PU or MS adhesive/sealant in a standard cartridge can work with a compatible cartridge gun, while a more viscous material in a sausage may require a higher-force tool with the correct barrel.
With two-component materials, the mixing ratio, cartridge system and static mixer must also be considered. Before purchasing an applicator, check the product TDS and packaging format.
Hot-melt adhesive applicators
Hot-melt technology requires a tool that not only feeds the adhesive but also maintains the required operating temperature. Depending on the system, the adhesive may be supplied as sticks, granules or another format. The applicator should be selected according to the adhesive system, application temperature and required output — not only by stick diameter.
How to choose an applicator – practical checklist
- Identify the product. Record the adhesive or sealant name and check its TDS.
- Check the package. 1K cartridge, sausage, dual 2K cartridge, syringe or hot-melt format.
- For 2K, determine the ratio. 1:1, 2:1, 4:1, 10:1 or another ratio specified for the product.
- Assess viscosity and flow resistance. High viscosity, a long or narrow nozzle and a static mixer all increase the required force.
- Define the work cycle. A few applications per day and several hundred cycles per shift are different use cases.
- Define the required dose. Is a continuous bead sufficient, or does the process require a specific dose-volume tolerance?
- Check ergonomics. Tool mass, trigger force, wrist position and operator exposure time matter in repetitive work.
- Confirm accessories. Mixer, nozzle, needle, adapter and plungers must be compatible with the complete system.
Manual vs pneumatic vs battery-powered – what about ergonomics?
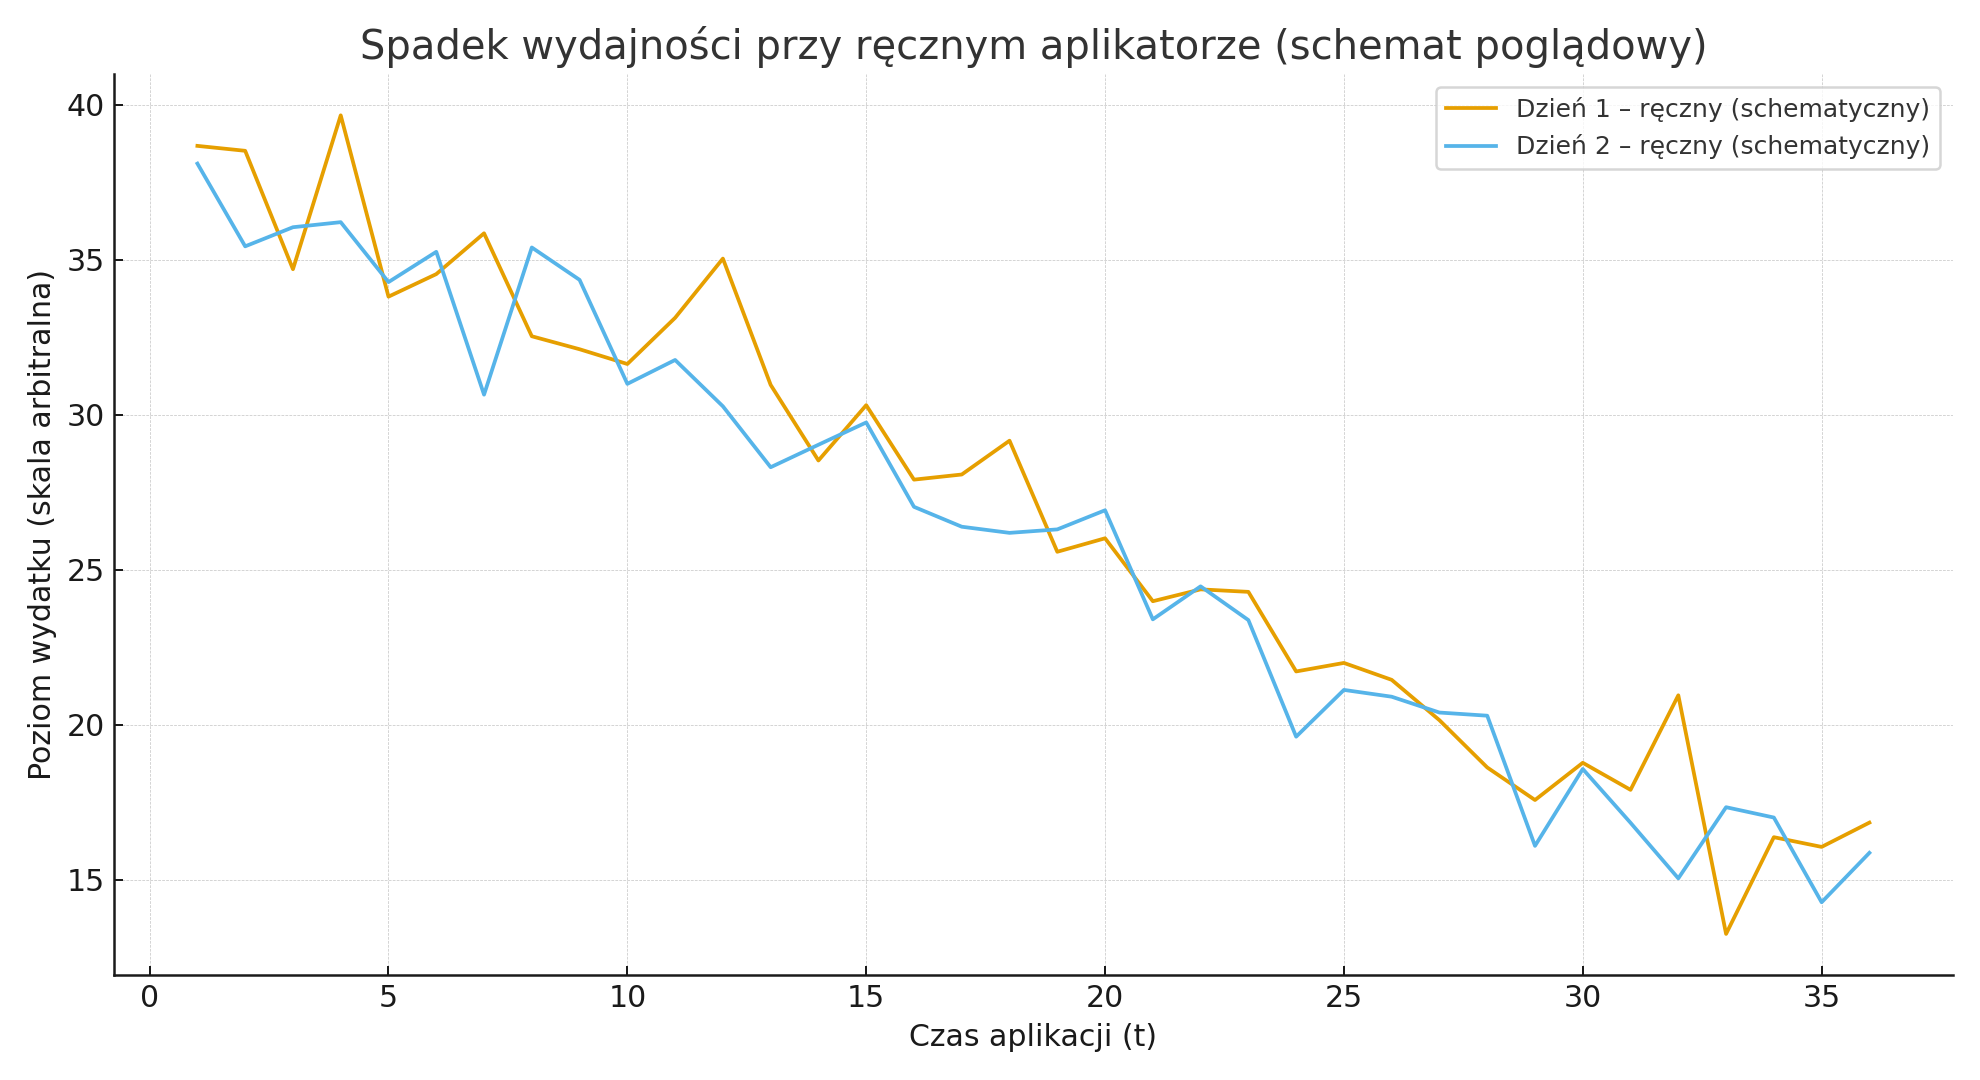
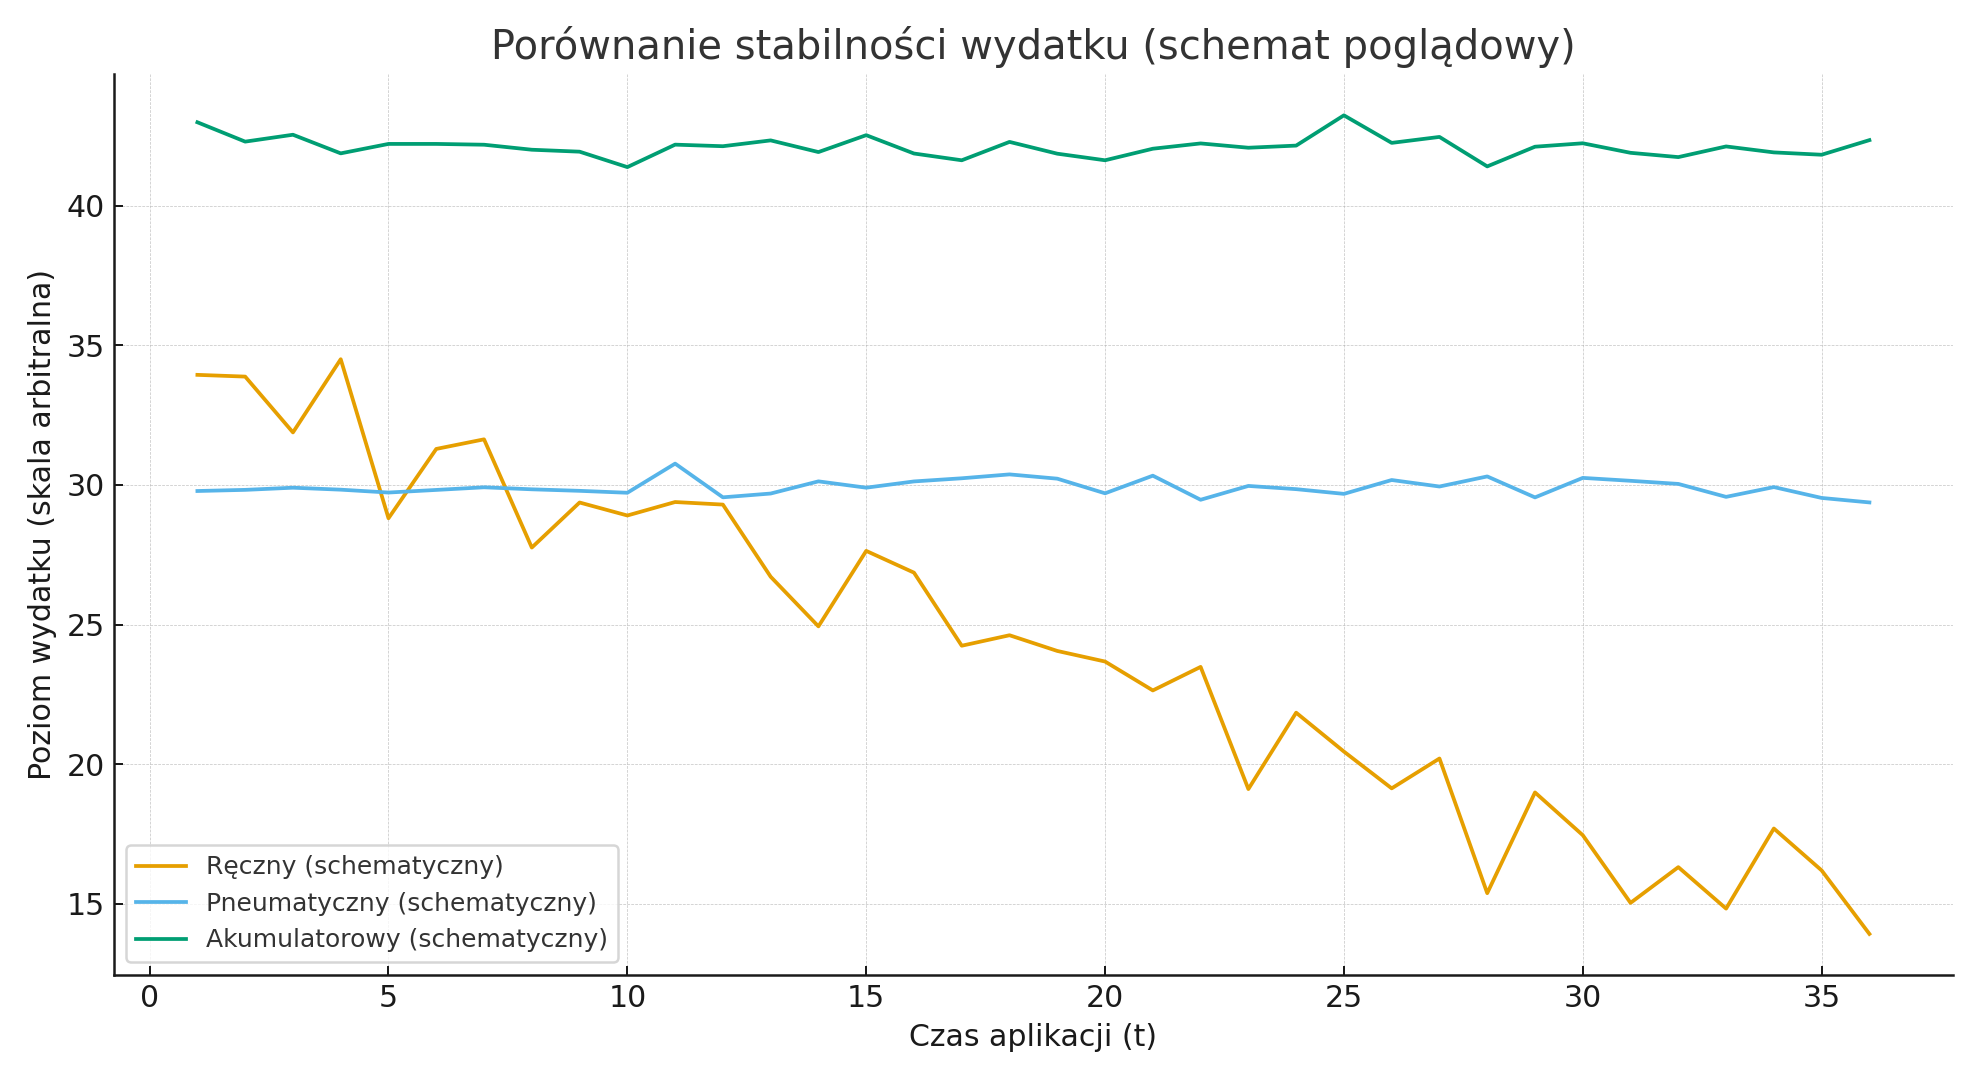
An earlier version of this article suggested that the performance of a manual gun starts to fall after the second cartridge. There is no basis for treating the “second cartridge” as a universal fatigue threshold. The point at which performance changes depends on required force, material viscosity, tool leverage, work pace, the operator and workstation organisation.
The underlying ergonomic concern is valid, however. NIOSH identifies repetitive and forceful hand movements as risk factors for upper-limb musculoskeletal disorders. Where cycle counts are high, the actual operator load should be measured and a manual tool compared with an assisted alternative.
How can you measure this in your own process?
Instead of counting cartridges by intuition, run a simple workstation trial:
- use one adhesive, one material temperature, one nozzle/mixer and one bead geometry,
- weigh or measure the amount dispensed during a fixed time or onto one component,
- record cycle time, breaks and the number of corrections,
- compare results at the beginning, middle and end of the series,
- repeat the trial with a manual applicator and the selected powered alternative.
Only this type of measurement can show whether a pneumatic or battery-powered drive improves cycle time and repeatability enough to justify changing the tool at a particular workstation.
Applicator ROI – calculate process cost instead of relying on a generic promise
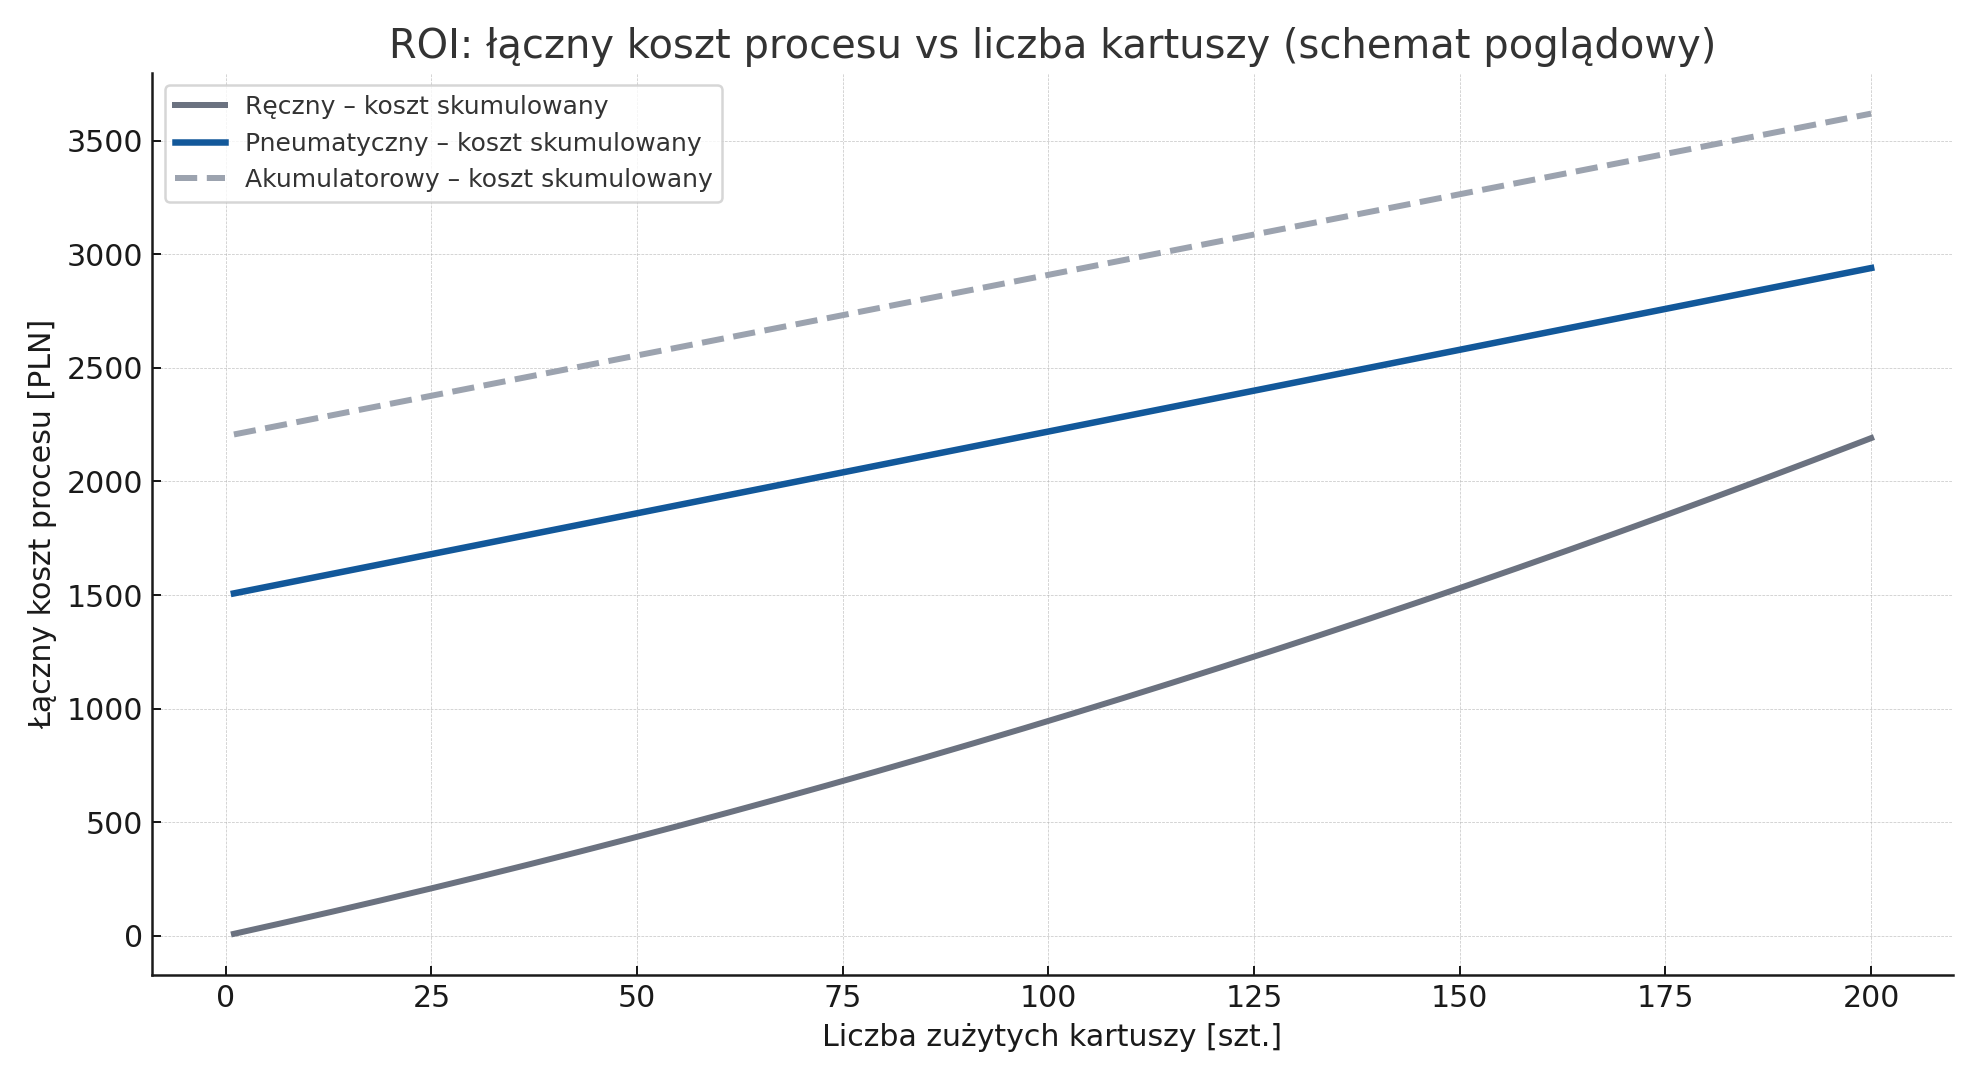
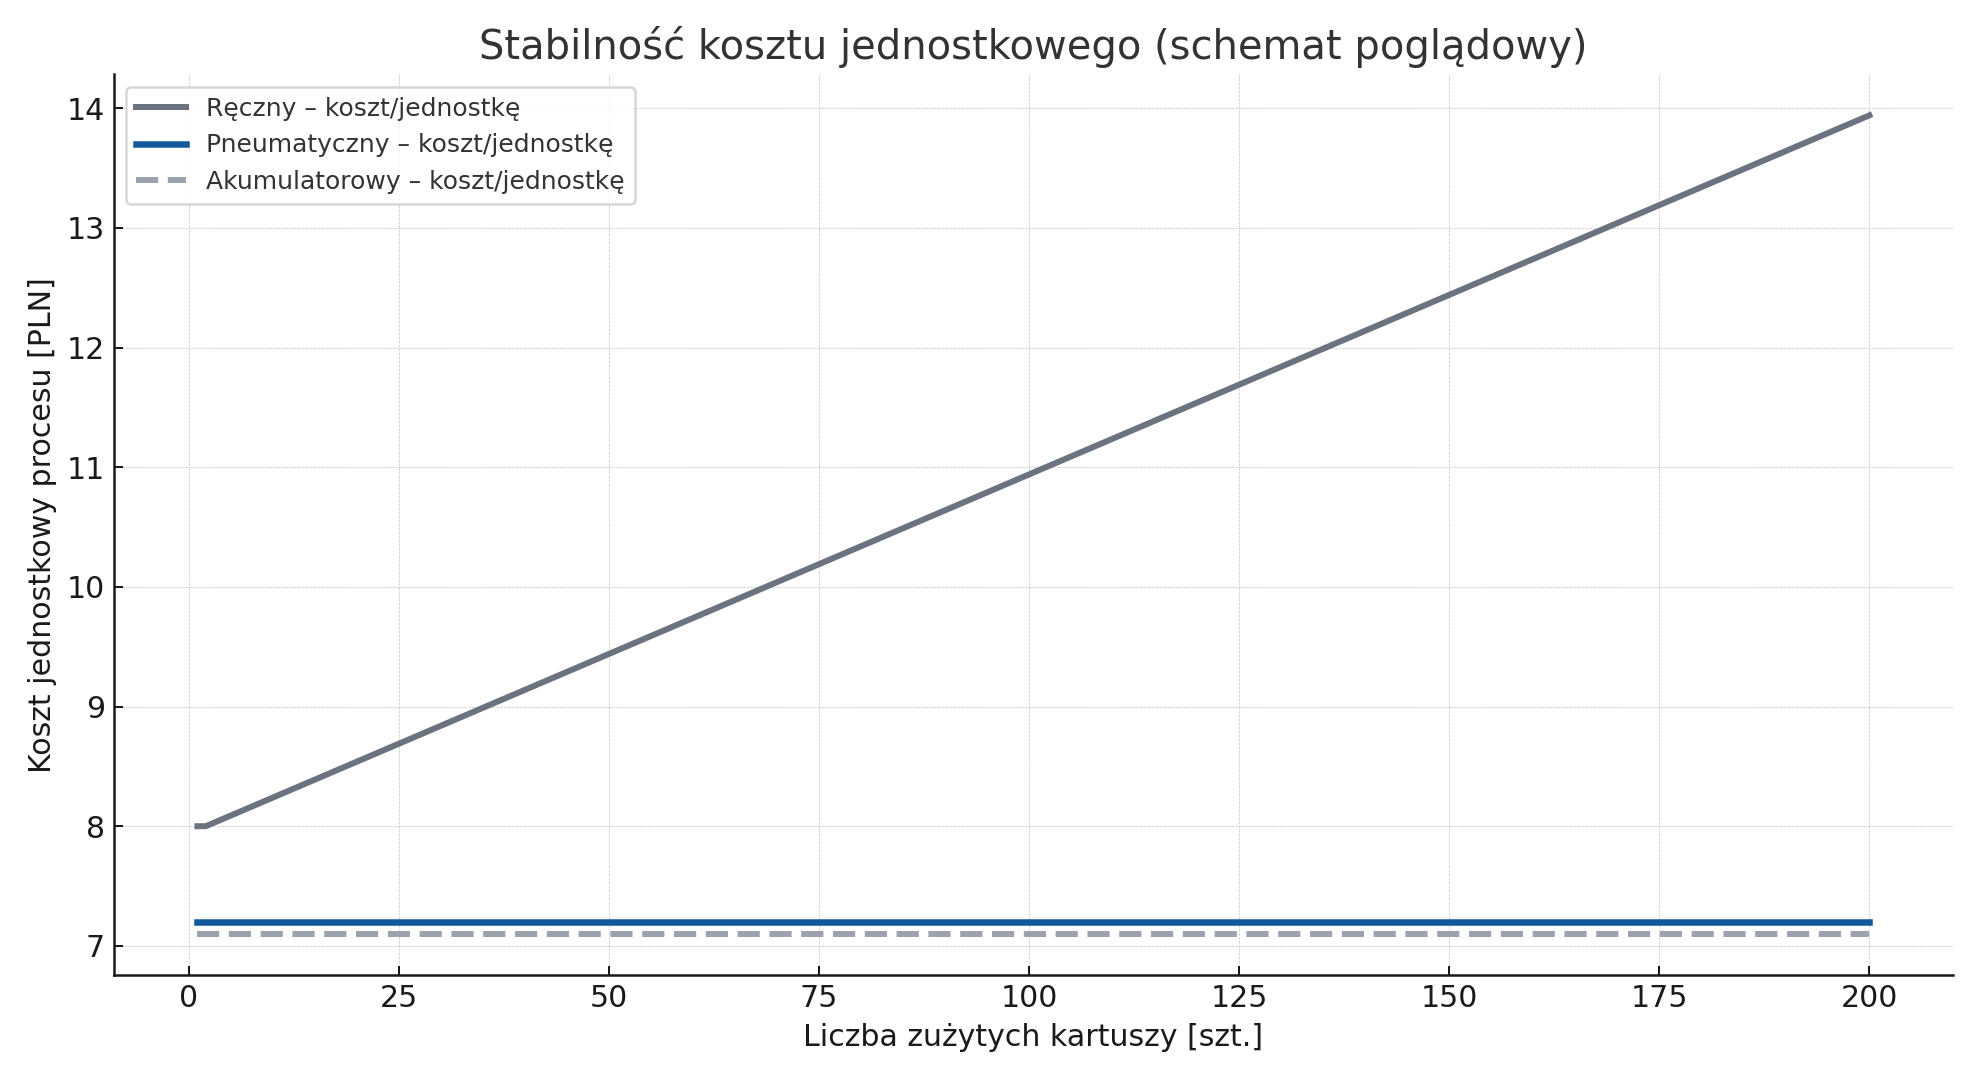
A higher purchase price for a pneumatic or battery-powered gun does not automatically guarantee a lower process cost. Likewise, a manual tool is not necessarily the cheapest overall just because its purchase price is lower.
A useful comparison should include at least the following:
| Cost element | What to measure |
|---|---|
| Operator time | Time per part, changeover, cartridge replacement and workstation cleaning. |
| Material consumption | Mass/volume per part, excess material, leakage and material lost during changeover. |
| Rework and scrap | Number of parts requiring correction because of under-dispensing, over-dispensing or an unstable bead. |
| Tool cost | Purchase, service, wear parts, batteries or compressed-air infrastructure. |
| Ergonomics | Required force, repetition count, reported fatigue and need for additional breaks. |
Which drive do you need? A quick decision guide
- Manual: when application frequency is low, mobility and simplicity are important, and the required dispensing force is acceptable.
- Pneumatic: when the workstation has a suitable compressed-air supply, the task is repetitive, and reducing manual squeezing force is important.
- Battery-powered: when assisted dispensing is needed without a pneumatic hose and mobility is important.
- Dispensing system / valve: when dose tolerance and cycle-time requirements exceed what a simple operator-held gun can reliably achieve.
Additional applicators and accessories
When building a dispensing workstation, consider the entire material path: tool, material package, tip, mixer and any adapters. Compatibility between these elements is more important than selecting an applicator only by the adhesive name.
...
FAQ – adhesive applicators
Which applicator should I use for a two-component adhesive?
Use an applicator compatible with the specific cartridge system, cartridge capacity and A:B ratio. Then select the correct static mixer. The description “2K applicator” alone is not enough.
Does a static mixer establish a 1:1 or 2:1 ratio?
No. The mixer homogenises the two supplied streams. The ratio is established by the compatible cartridge and applicator/plunger system designed for the required component ratio.
Is a manual applicator sufficient for regular work?
It can be, provided that the required force and number of cycles do not create an ergonomic problem and the process achieves the required repeatability. At high cycle counts, compare it through measurement with a pneumatic or battery-powered solution.
When is a dispensing needle needed?
Use a needle when the material must be deposited as a small dot or in a very narrow area. Match the diameter to viscosity and required flow. A tip that is too small can create unnecessarily high resistance.
Which applicator should I use for polyurethane adhesive or MS polymer?
First check the packaging and viscosity of the specific product. “PU” or “MS” chemistry alone does not determine the gun type. A 1K cartridge product and a 2K adhesive in a dual cartridge require completely different dispensing systems.
Does a pneumatic applicator always produce a more consistent bead?
It can reduce variation caused by the operator's manual trigger force, but output is still affected by air pressure, viscosity, temperature, nozzle, mixer and package resistance. Repeatability should be confirmed in the actual process.
After how many cartridges does it pay to switch to pneumatic or battery-powered dispensing?
There is no universal number. Compare cycle time, material consumption, rework, ergonomics and tool cost for the specific workstation. The diagrams in this article illustrate a way of thinking about the process, not a ready-made ROI calculation.
Need to choose an applicator for a specific adhesive?
Send us the product name or TDS, a photo or designation of the cartridge, its capacity, the 2K ratio and the planned number of applications. This makes it possible to select the gun, plungers, mixer and dispensing tip as one compatible system.
Technical sources
- medmix – MIXPAC DM2X 200/400, 2K adhesive dispensing and ratio selection
- medmix – MIXPAC cartridge systems, ratios, mixers and compatible dispensers
- medmix – overview of MIXPAC/COX manual and pneumatic dispensers
- medmix – static mixing technology for two-component materials
- NIOSH – ergonomic risk factors: force, repetition and posture
- NIOSH – hand-tool selection with consideration of force and repetitive motion
- Current Polish Melkib article used as the editorial reference