





Replacing a bonded windscreen is not just a matter of removing the old glass and applying a new bead of adhesive. The windscreen is an important part of the vehicle structure and safety system, so the quality of the complete installation process matters: removal, cleaning, surface preparation, adhesive application, positioning and final inspection.
This guide explains which materials and tools are typically used for automotive glass replacement and shows the process step by step using the same 13 illustrations as the current Polish Melkib article.
Key takeaways
- A bonded windscreen has both a protective and structural function in modern vehicles.
- Automotive glazing commonly uses polyurethane adhesives designed specifically for direct glazing.
- Surface preparation, cleanliness, bead geometry and curing conditions are just as important as adhesive selection.
- Safe drive-away time must always be taken from the documentation for the specific adhesive and application conditions.
- The complete process includes glass removal, frame preparation, adhesive application, positioning, temporary stabilisation and final inspection.
Why is correct windscreen bonding so important?
A windscreen protects the occupants from wind, rain and road debris, but in modern vehicles it also contributes to the structural behaviour of the body. This is one reason why windscreen replacement should be treated as a controlled repair process rather than as a simple cosmetic job.
Correct installation helps maintain:
- the intended structural contribution of the glazing,
- weather sealing,
- stable positioning of the glass,
- the integrity of the bonded joint during normal vehicle operation.
The repair should therefore follow the instructions of the vehicle manufacturer, glass supplier and adhesive-system manufacturer.
Which adhesive should be used for automotive glass?
Polyurethane direct-glazing adhesives are widely used for automotive windscreen installation. Many are one-component, moisture-curing products that form a durable and flexible joint after curing.
A suitable windscreen adhesive should provide:
- appropriate adhesion to the glazing system and vehicle body preparation,
- elasticity after cure,
- resistance to water, vibration and normal automotive environmental exposure,
- predictable application characteristics,
- a documented safe drive-away time for the selected installation system.
One example used in the Polish version of this article is TEROSON BOND 480. Henkel describes it as an OEM-approved, one-component polyurethane windscreen adhesive with an 8-hour safe drive-away time with airbags under the specified test conditions.
What tools and materials are needed?
- A replacement windscreen matched to the exact vehicle specification.
- A dedicated automotive glass adhesive and the compatible preparation products required by its system.
- Windscreen removal tools, for example a suitable cutting cord or TEROSON BOND EASY CUT.
- A scraper or suitable trimming tool for preparing the remaining adhesive bead according to the specified repair method.
- Approved glass and surface-cleaning materials plus lint-free wipes.
- Eye and hand protection suitable for work with glass and cutting tools.
- Temporary positioning tape where required, for example HPX 6200.
A traditional cutting string is also available as a reference product at Melkib product ID 3072, although the current product page marks it as withdrawn from the offer.
Windscreen replacement step by step
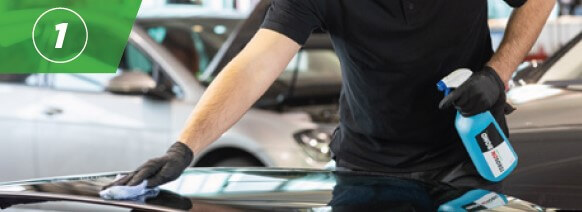
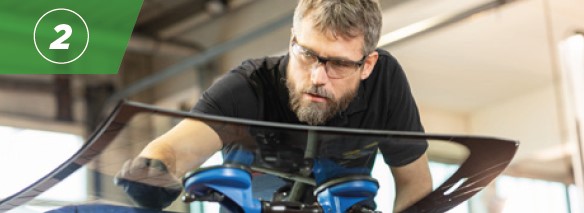
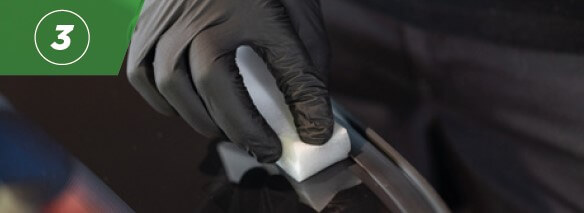
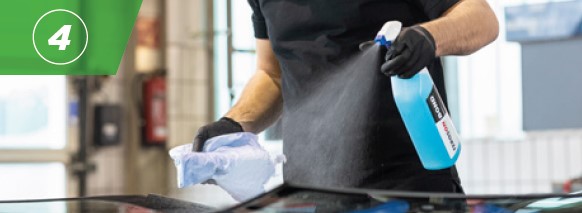
The current Polish article presents the process in 13 stages. In this English version the same photographs are retained, but each image is placed separately for better readability.
1. Clean the new windscreen
2. Inspect the glass before installation
3. Clean the bonding area
4. Perform the final cleaning step
5. Remove the old windscreen
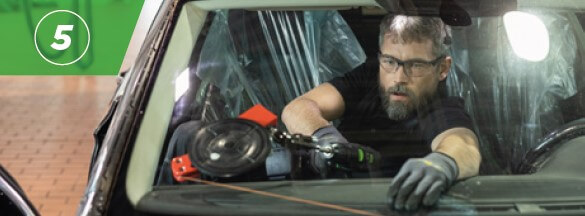
Henkel’s TEROSON BOND EASY CUT uses a braided polymer cord intended to reduce the risk of paint damage compared with a conventional metal cutting wire.
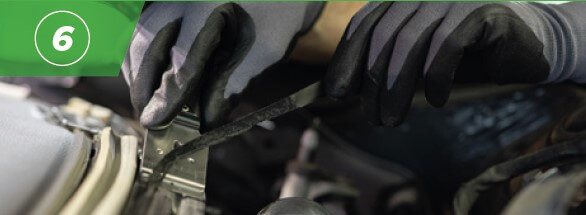
6. Prepare the vehicle frame
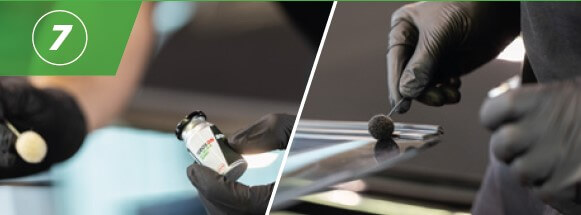
7. Use primer where the system requires it
8. Set the correct adhesive bead geometry
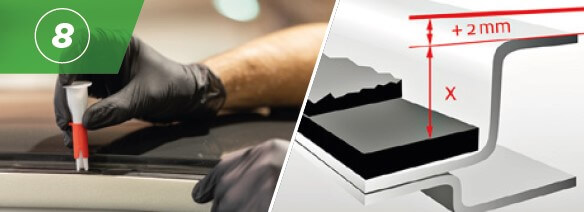
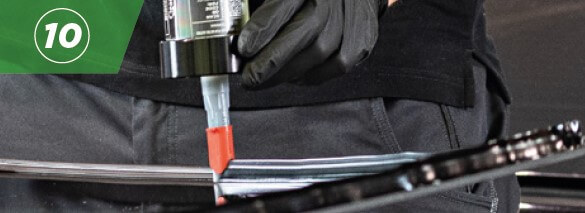
The purpose is to produce a continuous bead with the geometry required to position and support the glass correctly. Do not rely on a universal bead-height rule when the vehicle or product procedure specifies otherwise.
9. Prepare the adhesive for dispensing
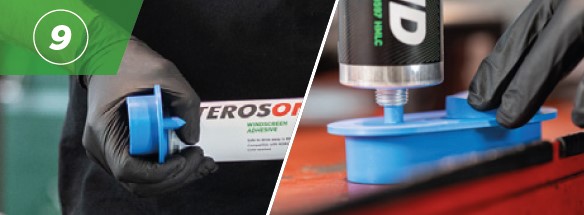
10. Apply a continuous adhesive bead
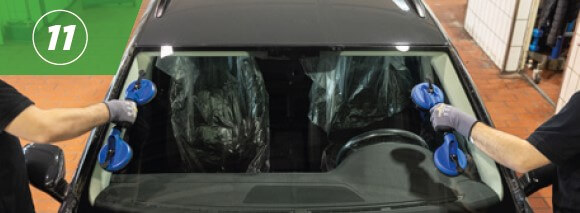
11. Position and stabilise the new windscreen
12. Respect the product-specific safe drive-away time
The old English version stated a universal 60-minute period. That should not be used as a general rule. For example, Henkel specifies 8 hours SDAT for TEROSON BOND 480, while other TEROSON products can have different safe drive-away times.
13. Perform the final inspection
At every stage, follow the requirements of the vehicle manufacturer, windscreen supplier and adhesive-system manufacturer.
Common mistakes during windscreen replacement
Even a high-quality automotive glazing adhesive cannot compensate for an uncontrolled installation process. Common problems include:
- insufficient cleaning of the bonding surfaces,
- incorrect preparation of the frame or remaining adhesive bead,
- using incompatible cleaners, primers or auxiliary materials,
- incorrect adhesive bead geometry,
- an interrupted or uneven bead,
- moving the glass after positioning,
- returning the vehicle to service before the required SDAT has been reached,
- using a product without checking the vehicle and adhesive-system requirements.
Is there a “magic” windscreen adhesive?
No single adhesive can solve every glazing problem independently of preparation, vehicle design and installation conditions.
Professional automotive glass replacement is a system process. The result depends on the adhesive, cleaners and primers, surface condition, removal method, bead application, positioning and cure conditions.
A well-selected product used with the correct process is much more important than a marketing claim about a “magic” or universally fast adhesive.
Repair or replacement – which is appropriate?
Not every windscreen defect requires complete replacement, but not every damaged windscreen can be repaired safely. The decision depends on factors such as:
- type of crack or chip,
- size of the damaged area,
- location relative to the driver’s field of view,
- distance from the glass edge,
- the structural and safety implications for the particular vehicle.
If the damage compromises safety, sealing or the structural function of the windscreen, replacement may be the appropriate option.
Related resources
For another automotive-glass repair topic, see Rear Window Defroster Repair – Which Adhesive Works Best?.
You can also watch the Melkib video related to automotive glass work: automotive glass video.
FAQ – automotive windscreen bonding
Which adhesive is commonly used for automotive windscreens?
One-component moisture-curing polyurethane adhesives are widely used for direct glazing, but the exact product must match the vehicle, glass system and required safe drive-away time.
How long does windscreen adhesive need to cure?
There is no universal answer. Safe drive-away time depends on the exact adhesive and its specified application conditions. Always use the current product documentation.
Can a windscreen be replaced without professional equipment?
Theoretically some operations can be performed with basic tools, but proper windscreen replacement requires controlled glass removal, surface preparation, adhesive application and safe handling. For safety-critical work, professional equipment and experience are strongly recommended.
Should bare metal always be primed?
Use the preparation system specified by the adhesive manufacturer. If paint is damaged and bare metal is exposed, the compatible primer or corrosion-protection procedure should follow the current product instructions.
Is bead height the same for every vehicle?
No. Bead geometry should follow the vehicle and adhesive-system procedure. The objective is correct glass positioning, support and continuous contact throughout the bonding area.
Is TEROSON BOND 480 a 60-minute safe-drive-away adhesive?
No. Henkel currently specifies an 8-hour safe drive-away time with airbags for TEROSON BOND 480. Other TEROSON windscreen adhesives have different SDAT values, so the product must always be identified before releasing the vehicle.
Looking for a current automotive glass bonding system?
Check the available windscreen adhesives and accessories or contact Melkib with the vehicle type, adhesive system and required service time.